Pinsa Is Pizza's Roman Relative—and You've Got to Try It
Pinsa: The Roman Secret I Can’t Wait to Discover (and Why It’s Not Just Pizza!)
Hey, my food-loving friends! If you’ve been following my Instagram and Facebook stories, you know I’m always on the hunt for delicious, authentic eats to share with you. I’m dreaming of my upcoming trip to Rome (my first-ever visit!), and while I’m beyond excited to stroll through the Colosseum and toss a coin in the Trevi Fountain, there’s one thing I’m really buzzing about: pinsa.
Yep, pinsa—not pizza, but its Roman cousin that’s stealing my heart before I’ve even tasted it fresh from a Roman oven. Let me tell you why pinsa is about to become your new obsession, too, and how I’m already experimenting with it thanks to a little Italian gem of a store right by my house!
What’s Pinsa, and Why Isn’t It Just Pizza?
At first glance, pinsa might look like pizza—oval, topped with deliciousness, and baked to crispy perfection. But don’t be fooled; this is no ordinary pizza. Pinsa is a Roman treasure with roots stretching back to ancient times, when Roman peasants mixed grains to create a hearty, cloud-like flatbread. The name “pinsa” comes from the Latin pinsere, meaning “to press” or “to stretch,” which perfectly describes how this dough is shaped by hand (no rolling pins allowed!).
What makes pinsa stand out? It’s all about the dough. Unlike traditional pizza, which usually relies on wheat flour, pinsa dough is a magical blend of three flours—wheat (preferably Tipo 00), rice, and soy. This combo creates a texture that’s light, airy, and crispy on the outside, with a soft, almost cloud-like interior. It’s less dense than pizza, easier to digest (perfect for those of us who love a second slice!), and has a subtle nutty flavor that pairs with any topping you can dream up. Plus, the dough ferments for up to 72 hours, giving it that perfect balance of flavor and fluffiness.
Pizza is like the outgoing, world-famous sibling everyone knows, while pinsa is the cool, sophisticated cousin who’s been quietly perfecting its craft in Rome’s hidden trattorias. Both are delicious, but pinsa’s unique texture and versatility make it a game-changer. It’s like comparing a classic pop song to an indie track you can’t stop humming—both great, but one feels like a discovery.
My Pinsa Adventure (Before I Even Get to Rome!)
Since I’m counting down the days to my Roman adventure, I couldn’t wait to get a head start on pinsa. Lucky for me, there’s an amazing Italian store just steps from my apartment (yes, I’m that excited about it!). They stock ready-made pinsa dough that’s legit—high-quality, pre-fermented, and ready to be transformed into a masterpiece in minutes. I grabbed a pack last weekend and let me tell you, it’s a game-changer for quick, delicious dinners.
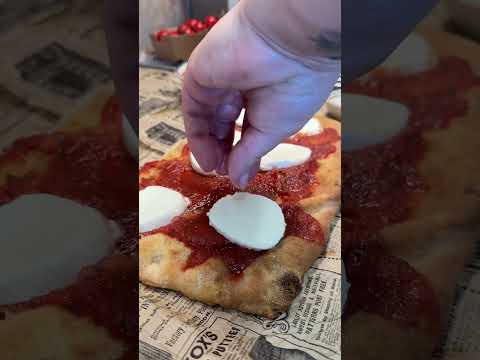
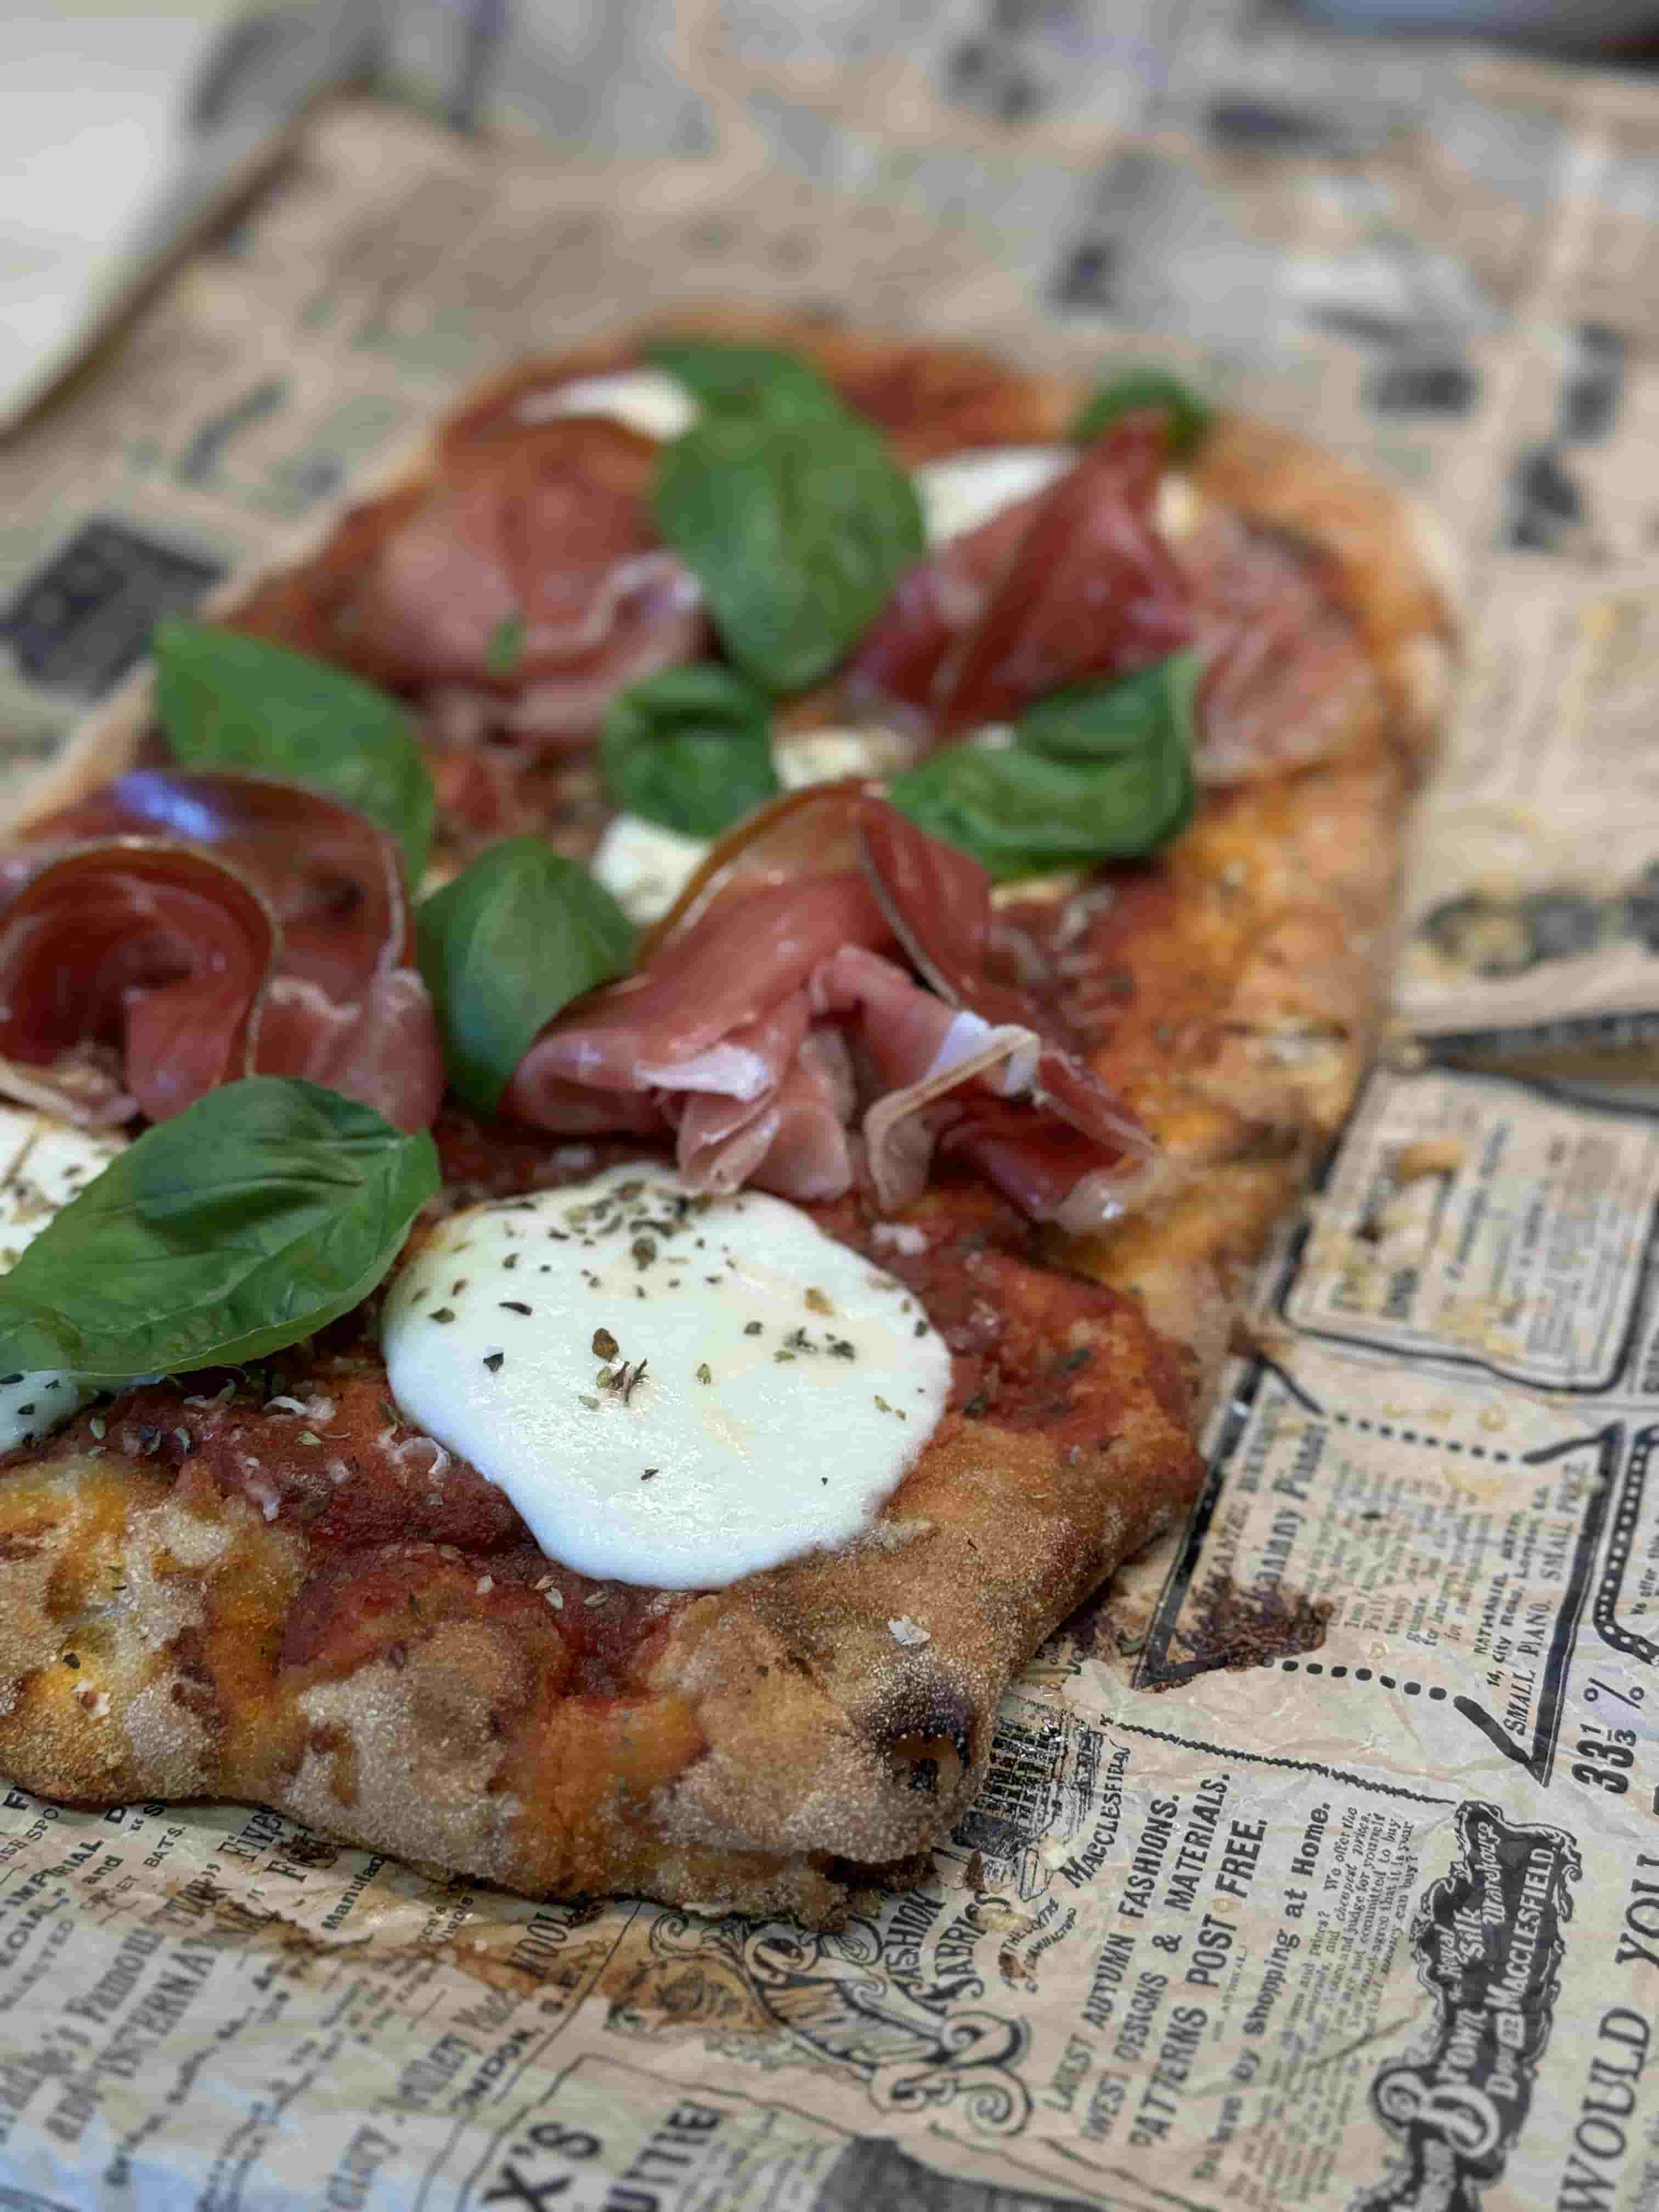
Picture this: I’m in my cozy kitchen, music playing, and I’m shaping this beautifully sticky pinsa dough (pro tip: lightly oil your hands to avoid a floury mess!). I went classic for my first try—fresh mozzarella, cherry tomatoes, basil, and a drizzle of olive oil. After just 8 minutes in the oven, I had a golden, airy pinsa that was crispy on the edges and soft in the center. It was like eating a cloud topped with Italian sunshine. I posted a quick video of the process on my Instagram stories, and you guys went wild for it! The best part? Pinsa is so customizable. Whether you’re vegan, gluten-sensitive (check with your store for options), or just craving something wild like figs and prosciutto, pinsa can handle it.
Why I’m Obsessed (and Why You Should Be, Too)
Pinsa isn’t just food; it’s a vibe. It’s the kind of dish that feels like a love letter to Roman history, crafted with care and meant to be shared. I love how it’s both rustic and refined—perfect for a casual weeknight dinner or a fancy dinner party. And here’s the kicker: you don’t need to be a pro chef to nail it. With ready-made dough from my local Italian store, I’m whipping up restaurant-quality pinsa in less time than it takes to order takeout.
As I plan my Roman getaway, I’m already dreaming of sitting at a little trattoria, watching a pizzaiolo shape pinsa by hand, and tasting one fresh from a wood-fired oven. Will I go for a classic margherita-style pinsa or something totally out there, like mortadella and pistachio? Either way, I’ll be sharing every bite on my Instagram and Facebook stories, so stay tuned!
Try It Yourself (and Join Me in the Pinsa Craze!)
If you’re as curious as I am, check out your local Italian markets for ready-made pinsa dough—it’s a total lifesaver and just as authentic as homemade. My neighborhood store has become my go-to for this high-quality dough, and I’m already planning my next pinsa night (maybe a spicy salami and burrata combo?). If you’re feeling adventurous and want to make the dough from scratch, it’s a labor of love that takes 72 hours but delivers big on flavor (see the recipe below!).
So, tell me—what toppings would you put on your dream pinsa? And if you’re in Rome or have a favorite pinsa spot, drop it in the comments—I need all the recs for my trip!
Let’s keep the foodie love going on Instagram and Facebook, where I’ll be sharing more pinsa experiments and my Roman adventures soon. Buon appetito, friends! 🍕✨
Pinsa Romana Recipe: A Light and Airy Roman Delight
Makes approximately 4 dough balls (about 250 g / 8.8 oz each)
Pinsa is a Roman specialty with a unique, airy texture thanks to a blend of three flours and a long fermentation process. This recipe requires 72 hours of dough resting, so plan ahead (e.g., start on Wednesday evening for a Saturday night pinsa). For convenience, you can buy high-quality pre-made pinsa dough at many Italian stores—check your local market!